Wednesday, July 31, 2013

Blueberries on the floor and other musings...


So we are seeing a lot of these lately.  We are experiencing a bumper crop.  We have also had no rain.  This makes for happy blueberries.  So we pick and then pick some more.  Today we had some u-pickers.  That was interesting.  The little boys, who came with their mom, got into the ditch beside the blueberries and were top to toe in black peat mud.  I hosed them off.  With their mom's permission.  But I digress.  This is the time of year where blueberries are often found on the floor in the kitchen.  It just happens.  

We are rather new to the whole business of blueberries and as we bought an established farm, we don't have any information about the actual varieties so we make up names.  We really like picking marble berries.  They are big, round and tasty.  But the best berries are the cake berries.  They are HUGE!!!!!  I put them next to our now defunct Canadian penny.  That is a marble berry on the far right.  The cake berries are on the left.  They are they best.


The recipe from yesterday...
Let them eat cake
1/2 cup margarine or butter
1 cup sugar
1 egg
1/3 cup milk
1 teaspoon vanilla
1 and 1/2 cups flour
1/2 teaspoon salt
1 teaspoon baking powder
3 cups blueberries, fresh or frozen  (the original recipe asks for 1 and 1/2 cups of blueberries but we kinda think go big or go home)

In a large bowl, cream shortening and add sugar gradually.  Add egg.  Mix the dry ingredients.  Add to batter along with the milk, vanilla and blues.  Pour the batter into an 8" by 8" pan and bake at 350 degrees for about 50 to 55 minutes, less if you are skimpy on the blues.  Or if you are feeling so inclined, pop them into cupcake papers and make 8 jumbo to die for blueberry cupcake muffins.  Oh my goodness.  So fabulous.  Bake those for about 40 minutes but watch them.

So there.  Check the floor after baking.  Blueberries just have a way of landing there and trust me, they aren't pretty when you step on them.  Ick.

Linking up with Cindy at Random Thursday.

Tuesday, July 30, 2013

Work in Progress...


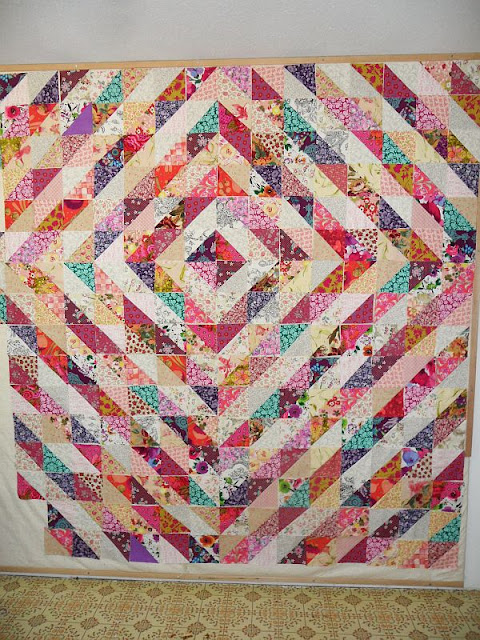
I had to bring out the step stool.  This is a biggie.  The HSTs are 5.5" and it is filling up the design wall entirely.  Ack!  Tomorrow I will start sewing it together.  It actually grew much faster than I thought it would.  I was staring and staring at it and then I decided that I needed to shift the whole thing to the right by two columns.  I moved every last stinking HST over.  Even though that was a total pain, I wanted the off centre effect to be more pronounced.  Nobody sneeze!!!!


(All those boxes to the right in the other room are just my school stuff that needs to get moved into my new office but that too is a work in progress.)

This is before the move right...  It was too centred.  


Then I started making another needlebook.  I love making these.  I used some itty bitty sawdust scraps and some linen scraps.  I need to do all the fun stuff now.  The little pages need some pretties.


And I canned beans.


And we ate these...
We had some people over to pick blueberries and the little kids had a picnic tea party under the blueberry bushes with these.  Total yum!


Linking up with the Needle and Thread Network and Lee at Freshly Pieced for Work in Progress Wednesday.

Monday, July 29, 2013

On Saturday I....


On Saturday I got together with a bunch of my guild to make a guild quilt.  We needed one and we didn't have much time.  Several of the guild members are off to Portland in August for a guild meet up and we are supposed to have a guild quilt that sort of represents us.  SO... here it is in process.  We used Denyse Schmidt's Anyway You Slice it as inspiration.  Lots of Kona solids in our "guild logo' colours and a bunch of things from our respective stashes.  Seriously!  It came to together like nobody's business!  That is Cynthia and Christine making design decisions.  And then below, Lysa is being the walking quilted model.  Nice feet! I have to say that this was such a wonderful fun collaboration with people cutting, other people stitching, people pressing and people putting up the blocks.  So much fun!


Here is the back.  The back took longer than the front!  How funny is that????  The quilt is now with Cynthia who will quilt it on her new Juki (so exciting) and then I will do the binding.  Quilt in a day.  Almost.


Then Cynthia played with the block trimmings and in no time flat had this...


Squeal!  Love it!

and we were left with this...pin cushion stuffing!


Sunday, July 28, 2013

Design Wall... playing with value


I started this the other day.  I chopped up scraps and bits and pieces until I had a big stack of lights and darks.  Then the half square triangle fest began.  The squares are 6" and I then trimmed the HSTs to 5.5".  Still lots to make and lots of tweaking as the whole thing shows up on the design wall.  This quilt is telling me it will be a big one.  I have been wanting to do this for a long time.  I really love the play of value.  And I think I have been toying with this inspiration for years!

Linking up with Judy's Design Wall Monday...


Thursday, July 25, 2013

Black and White TV... all done!

Name:  Black and White TV
Design:  Depression Blocks in Black, grey and white for That Stash Bee
Size:  approx 60" by 70"
Fabric:  scraps from my bee mates stash, Kona White, and bound in Kona Charcoal, Backed with Ikea Number Print
Quilted: by me with Aurifil 50 wt in white

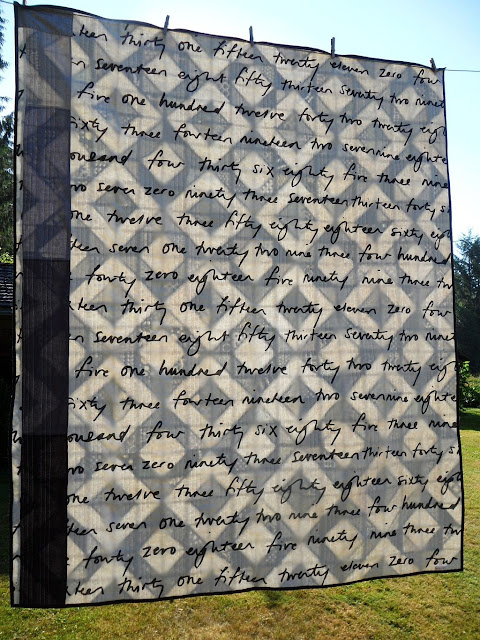
I made this quilt with the help of my awesome bee mates at That Stash Bee.  My month was May and I asked for Depression Blocks made with black, grey and white prints.  I asked them to think of Black and White TV.  And they did!  I was quite happy to open up all the soft and squishy packages of quilt blocks over several weeks.  Then I had to get busy and make some blocks myself to make the quilt big enough.  

I quilted three rows of straight line stitching on each side of the blocks.  I used Aurifil 50 wt in white of course! It gives a really nice texture and there is a nice break in the quilting at the centre of each block.  I adore straight line quilting!  I love the scrappiness of the blocks and oh, did you notice how one little red triangle snuck into the quilt?  I couldn't resist.  

I backed the quilt in the fabulous number print from Ikea with a strip of grey solids and bound the whole thing in Kona Charcoal which is such a fabulous deep grey.  All finished.  Linking up with Amanda Jean for Finish it up Friday.  


Wednesday, July 24, 2013

Work in Progress Wednesday


So after finishing my  Black and White TV quilt, working away on the Lucky Stars BOM, finishing my bee blocks  and continuing on with Road to Fortune, I decided to start something new.  I have been stewing away for ages about doing a value quilt...  so I finally just started it.  So far it has just been about cutting up fabric.  I am looking through the scrap boxes and pulling bits and pieces from my stash.  It feels good to be cutting up stuff that may not have been used in other projects too.  I am planning on using some fabric that may not be on my favourites list but will work nicely in this mix.

Pictures of Black and White TV are coming.

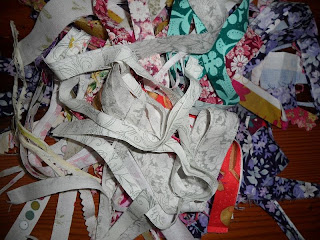
While I was cutting up stuff, I decided to take Cheryl and Amanda Jean's advice and separate my string scraps from my regular scraps.  I still have to go through all my scrap boxes to find the strings but I have a start on it.  This makes a great deal of sense to me!


And all this stuff?  Pin cushion stuffing.  Apparently it makes the very best... who knew?


Linking up with Lee at Freshly Pieced for Work In Progress Wednesday and The Needle and Thread Network for Canadian Bloggers.

Tuesday, July 23, 2013

Bee Blocks and stuff...


This month we made Arkansas Traveller blocks for Kelsey using the tutorial at Freshly Pieced for the That Stash Bee.  She wanted us to think bright and scrappy so that is what I did.  I have to say that the blocks went together quite nicely.  The first one I made was not nice enough.  I sort of messed up.  Sometimes directions tell you to take the paper off before you sew the quadrants together and other directions tell you to leave them on.  Let me just say that leaving the paper on for these blocks is a good idea.  Yep.  So I made another one, leaving the paper on this time.  Much better.

Other than that I received a lovely email from Rachael who blogs at Rachael Rabbit.  She was wondering about the fabrics I used in my I Spy quilts.  This can be a challenge if you don't have much of a stash.  I have been very lucky with blog friends sending me I Spy type fabrics over the years.  I was helped out initially by Riel when I won a giveaway of her scraps and Jan-Marie in Australia sent me a stuffed envelope of scraps which I still use in my I Spy quilts.  I also happen to have a really big stash with lots of novelty fabrics.  And just recently, Brenda, offered to send me some of her I Spy squares.  So I thought I would help Rachael with a little bit of "pay it forward" and send her some I Spy fabric to get going.  I stuffed and envelope full of fabrics.  Rachael had an idea to make some I Spy quilts for charity so if anyone else can send her a bit of novelty fabric scraps she would be ever so grateful. She is planning for 4" squares. I know that these quilts do very well at charity events.  The one I donated helped raise over $700.  So have a look at Rachael's blog and see if you can help her out a bit.


Monday, July 22, 2013

Perfect Circles!


On Saturday, I took Cheryl Arkison's Perfect Circle class.  It was jointly organized by my guild, the Fraser valley Modern Quilt Guild and the Vancouver Modern Quilt Guild.  I packed up Daisy Marie and a whole bunch of fabric because I just could not decide and drove over the bridge for a day of quilty fun.

It was just great!  I learned that circles are not scary. And that a featherweight can do just about anything well.  I was a little worried when I saw everyone else had brought more sophisticated machines but I just straight stitched when it came to applique techniques and it looks neat and tidy.

This circle is of centre on purpose just so you know and is a freezer paper circle applique.  Perfect!


This circle is a little off centre, not on purpose, oops and is inset!  Yay!  No puckers!!!  This worked like stink!


And then on the top, quarter circles.  We learned to make our own freezer paper templates as well so we can make quarter circles any size.  After cutting them out, I was convinced I had totally messed up but it worked like a "hot damn!"  Oh man!  I was totally impressed with how easy that was.  So there, perfect circles!  Cheryl has a perfect Circles Crafsy class, just so you know.

Linking up with Judy's Design Wall Monday.  

Friday, July 19, 2013

Phew...


Okay, so I am supposed to be on holidays but I have been so busy!  Yesterday I went into the big city to see Cheryl's trunk show.  It was just so awesome.  Not the driving. That was terrible as anyone who has driven into and around Vancouver will attest.  But the trunk show was awesome.  I was also able to get a copy of her not yet released book.  Squeal!  Don't tell anyone!

It was also daughter's birthday yesterday.  She was really happy with the scrub tops that I made her.  Yay!  I cannot believe she is already 24!!!!  She is supposed to be our baby!

And we started picking blueberries yesterday, at least more than just a handful.  So we are into the harvest and will be spending hours and hours picking fabulous blues.  Husband does the bulk of it.  And when we get sick of it all, we start calling friends and family.  Then when we have used all of them up, we put up welcome signs for birds.  They wait until we are ready.  Most cooperative.

Tomorrow is the perfect circles class with Cheryl and I have to settle on fabric.  No more waffling!


Wednesday, July 17, 2013

Plugging away...


Well, will you look at that?  I decided that I really must finish this before starting another something... This is Black and White TV and was made in large part by my bee buddies at That Stash Bee.  My month was May and I selected the classic depression block and suggested Black and White TV as the inspiration.  I placed one small red triangle in a block just because.  It is a lot of fun getting all the blocks in the mail.  In between trying to figure out my new phone today, I got all the blocks together and the back made.  I just finished sandwiching the whole shebang so it is all set for quilting.  Apparently I looked like I had a had a workout after the spray basting.  And my hair had gone all crazy from the humidity we are experiencing.  I don't know what it is about crawling around on the floor, manhandling a quilt but yes, apparently it is a workout!

And... tomorrow evening I am off to see Cheryl Arkison's trunk show in the big city.  We are joining up with the Vancouver Modern Quilt Guild and having classes and a trunk show.  I am set for the Perfect Circles class with Cheryl on Saturday.  I have not picked out my fabric yet but I have all the other things from the list of supplies.  Circles!  Seriously, so exciting.

Linking up with Lee for Work in Progress Wednesday and the Needle and Thread Network.

Monday, July 15, 2013

Swap making...


I signed up for a couple of swaps on Flickr.  This is for the Sweet and Simple Swap where you swap 50 charm squares from your scrap stash and a sewn item.  My secret partner wanted a pouch so I played around the other day with this.  Lots of hand quilting around the scrappy star and then lots of machine quilting on the green dots.  I was able to dive into my solid scrap bin for the back of the pouch.    I am calling this a finish!


 the back...


And here are the charms that I have cut... There are a few more than 50 but I don't think anyone will mind!


Saturday, July 13, 2013

Who is going camping? a little sleeping bag tutorial


This is the time of year when lots of people go camping.  How much fun is it for your little ones to have a sleeping bag for their favourite stuffed companion or doll?  I can remember my mum making a little sleeping bag for one of my dolls.  The funny thing was that we were going on a back packing canoe trip so I was allowed only one toy and it had to be tiny.  I had a tiny little doll about 4" long and mum made her a wee sleeping bag.  I must confess I still have the doll and the sleeping bag!  Anyway... let's get busy!


Supplies:
-2 rectangles of fabric-19.5" x 28"  (one for lining and one for the outer bag)
-1 small piece of cute fabric for a patch on the sleeping bag (I used the same fabric for this as for part of the pillow case to tie the 2 together)
-2- 24"  lengths of grograin ribbon for sleeping bag ties

(I used a flannelette for the lining... so cozy!)

I made a boy version last year!   Feel free to adjust the length of the sleeping bag to accommodate the toy.  This size should work for an American Girl doll.  My baby doll model is approximately 17" long and she still had toe room.

Method:
1.  With the rectangles right sides together and then folded in half to form the sleeping bag.  Your rectangle, when folded will measure 19.5" by 14".  Use a plate to mark a curve on one corner of the fabric on the non-folded edge.  Way to go!


2.  Unfold the fabric and taking only the outer sleeping bag fabric, place the decorative patch of fabric wherever you like.  I like to place it near the bottom and close to where the bag will be folded.  I used my pinking blade rotary cutter.  Nice!  Place wrong side of patch to right side of bag fabric.  Stitch 1/4" from the edge around the patch.  


 3.  Sandwich the bag, right sides together.  Pin and stitch 1/4" seam around the outside of the bag, leaving an opening near the bottom edge to turn the bag.  Turn and press.  Slip stitch the opening closed.

4.  Fold the bag in half, matching edges carefully.  Place the two sections of  ribbon (folded in half) inside the sleeping bag and pin.  Make sure the folded edge of the ribbon is placed inside the sleeping bag enough to catch it in the top stitching you are about to do.  I placed the ribbon 1.5" from the folded edge and then 5" from the folded edge of the bag.  Pin!


5.  Notice how the pins, do not go all the way to the top edge of the sleeping bag?  I stopped pinning 7" from the top edge.  That will form the opening of the sleeping bag, allowing easy access in and out of the sleeping bag.

Topstitch 1/4" from the edge of the sleeping bag, all the way around until you have reached the pin marking the 7" opening,  Secure your stitching and then stitch close to the edge for a second row of topstitching!   You are done.  How cute is that?


You can also make a pillow.  My tutorial can be found here!

To fold up and roll the bag, fold in half lengthwise and roll from the non-ribboned edge.  Secure the roll with the ribbon ties.  If your little one is not up to tying, then use wider ribbon with a velcro closure attached to the ribbon.  This would be a bit more fiddly to make but less frustrating for littles.


All snug!  Don't feed the bears!

Friday, July 12, 2013

I Spy A Clone...

  Quilt stats

Name:  I Spy a Clone!
Design:  224-4" squares with 4" border
Size:  62" by 70"
Fabric: I Spy Scraps and stash fabrics
Quilted: by me with Aurifil 50 wt in white


A few months ago, I made an I Spy quilt for a raffle prize at  my school's spring carnival.  It was a huge success and one family in particular kept talking about the quilt after they were not the winners.  During the last week of school, I was asked to make them one.  And here it is.  Same design, same size but obviously a different mix of I Spy squares.  I was able to take the quilt to show at my guild meeting last evening and today it goes to its new home.

The most time consuming aspect of making a quilt like this is the cutting of the squares.  Oh man!  It takes such a long time to get all the little squares fussy cut.  I was a little smarter this time and cut extra squares as I went along.  Some how I think there will be more of these in my future.

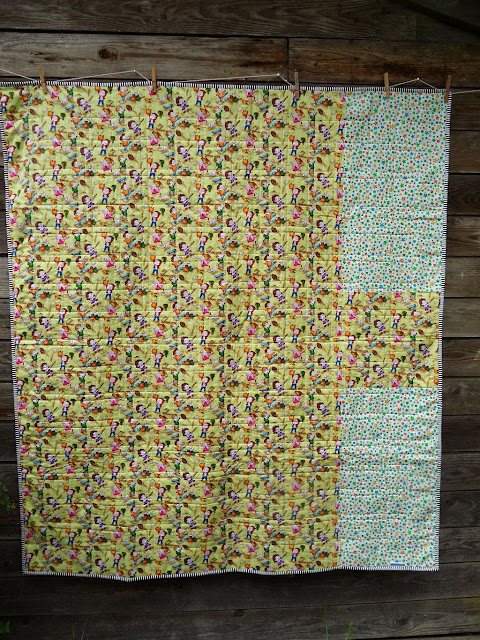
Just a note about the squares. They are 4" squares, the only time there is a repeat in the fabric is if the print repeat is a different mix of spy-ables.  The quilting is my stand-by... a grid of stitching on either side of the squares in Aurifil 50 wt in white.  I love how the grid shows up on the back of the quilt!

Linking up with Amanda Jean for Finish it Up Friday!