Okay... get inspired. Picnic time and BBQs on the deck are coming up and who doesn't have a whack of scraps to use up? This tutorial is also layer cake or fat quarter friendly. Heck, you can even use some charm squares if you have them.
I made this table cover for my Mum for her deck table. It went together quickly and I thought a tutorial might be fun. I have to say that this is my first official tutorial! Oh my goodness!!!!!
For a 50" diameter round table cover... (that is good for a 39' round table and allows for a nice drop over the table). If you need a bigger cover, just add another strip of rectangles and squares. If you have a rectangular table, this tutorial will work just fine. In fact, this would make a really cute quilt too! How completely versatile!!!!
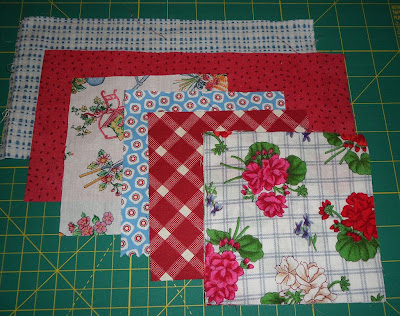
1) Top: You need 60 - 5" squares and 60 - 5" x 10" rectangles. A layer cake would work almost perfectly (you would need a few extra 5" squares) or about 12 fat quarters.
2) Back and inner layer: You will need fabric for the back and also, I used a layer of cotton in between the top and the back rather than batting. I thought batting would make things to stiff. I used a perfect thrift store sheet for the back and binding. If you don't have anything wide enough, you will need to piece the back. About 2 yards for the back and the same for the inner layer.
3) Binding - about 1 yard. Cut your binding on the bias, and you will need about 13 feet of binding - 2 1/2" wide. This is one of those times when you can do really impressive math! Figure out the circumference of your circle. (
Circumference = π × diameter or Circumference = π × 2 x radius)
*Word to the wise: Because this is a circular table cover, you must have your binding bias cut.
Cut, cut cut:
If you use a layer cake, pick 30 of the pieces and cut them in half so that you have 56 - 5"x 10" rectangles. Take the 12 remaining layer cake pieces and cut them into 4 - 5" x 5" squares. You should have 48 squares. You need 12 more 5" squares so you can cut them from your scraps or use a coordinating solid. Your choice.
If you are using scraps and stash stuff, then just cut and make it scrappy.
Piece, piece, piece:
Use 1/4" seams.
You will be alternating a square with a rectangle. You can chain piece square and rectangle partners. Then chain piece the partners with other partners. Press your seams to one side. Your strips needs to alternate starting with a rectangle and the next row with a square. Use your design wall or floor so that you do not have the same fabrics touching.
Row 1: square, rectangle, square, rectangle, square, rectangle,square, rectangle
Row 2: rectangle, square, rectangle, square, rectangle, square, rectangle, square
Repeat until you have 12 rows. Notice how I cheated a bit because I knew that the corners of the top would be cut away when I trimmed the top to the circle pattern. You can cheat too. You do not need to have 12 full rows for example. You can fudge it a bit because you are cutting away the corners.
Then you get to make your giant paper pattern circle:
You have a choice here. You can bother your husband and have him do it or you will have to do it yourself. Start by taking a bunch of newspaper and tape it together so that you have a piece of newsprint about 60" by 60". Tie a length of string to a pencil at each end. The string length needs to be the length of the radius of your circle. In my case, that's 25". Draw your circle, using one pencil as the point at the centre of your circle and drawing with the other pencil. Look at that lovely newsprint pattern! I just have to tell you that I almost messed up because I did not write down the measurement for my Mum's table. When I checked with her, we had to add extra inches to the pattern. Yoiks!
Cut your circle:
Carefully place your pattern on the pieced top. Check your measurements carefully before you cut.
Don't cry about cutting off all the corners because you can reuse them in a future project. You might even want to use them to piece the back of your table cover.
You will also need to cut your inner layer and your back from the same circle pattern.
Oh my goodness, what a pretty circle!
Sandwich and quilt, quilt, quilt:
I used my walking foot
and quilted on either side of the seams along the length of the strips and then in the other direction. But it is totally up to you!
Bind!
I am just getting ready to hand sew the binding on in this picture.
And here it is today in the sunshine...
I am linking up with
Quilt Story Fabric Tuesday. Go and check what other people have been up to!


